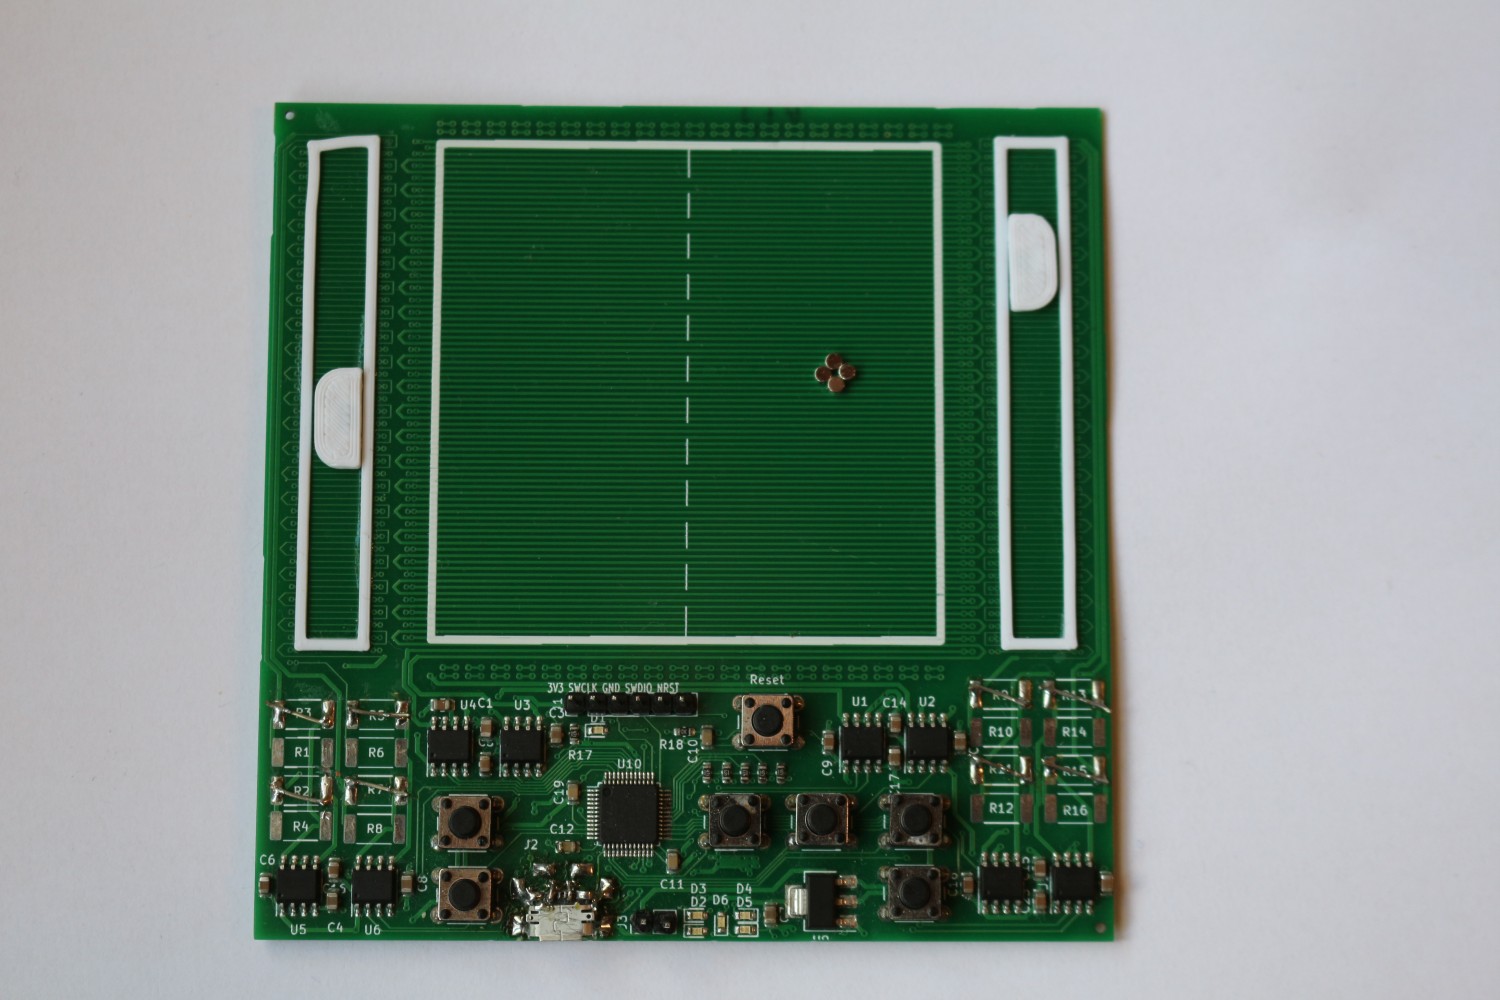
Description
This project is largely inspired by the 2D stepper motor from bobricius on hackaday. I loved the concept and thought I could make a Pong game from it. Little did I know that driving and designing this thing would result in lots of headscratching and tinkering but in the end everything worked as I imageined.
Design
With this project I not only wanted to try to build a Pong-Game, I also wanted to try out the SMT assembly service of jlcpcb. This influenced a lot of part choices - a good example for this is the H-Bridge IC. Since I do not speak Chinese, I could not read the datasheet in its entirety and just hoped for the best.
Working principle
The basic principle is the one of a stepper motor - just unfolded to a linear plane. There are 4 connections for each paddle and 8 connections (because of the x and y coordinate) for the ball. The PCB has two layers and the top and bottom layers are used for x and y coordinates respectively.
Schematic
The schematic is quite straightforward. Each linear stepper uses two H-Bridge drivers. The rest of the components just connects the H-Bridges, switches and power supply to the STM microcontroller. At first, I thought I might need a lot of power-resistors for driving the paddles. In the process of developing the software, I noticed that PWM was very effective and therefore I did not need to populate these and would definitely omit these in a redesign.

PCB
I thought a lot about the thickness of the traces used for the steppers and I definitely wanted to make the wires on the bottom layer a little thicker to allow for more current. Because these are farther away from the magnets than the top layer and therefore need more current to achieve a similar force on the ball. The thickness was chosen to allow for approx. 1A and 1.5A current respectively at 5 V (which worked quite well). Unfortunately I messed up and made the top layer thicker and the bottom layer thinner. At first I thought that I needed to reorder the PCBs - but with some trial and error I could still get this version to work.
In a redesign, because of the lessons I learned from this prototype, I would obviously correct my mistake and also make traces thicker in general. From testing, I learned that PWM was very effective (during design I was not sure if this would work because I could not read the specification of the H-Bridges and the forces would also be modulated) - but at around 30 kHz (to avoid audible PWM noises) everything works just fine.

Software
The software of the STM32 is written using the STM32CubeMX which was quite new for me as I mainly used ATmega controllers before. The abstraction from the hardware had a lot of pitfalls for me in the beginning, but I quickly learned to appreciate it. I used lots of timers for all the PWM as well as controlling the game. When I could finally control the ball in a more or less reliable way (dust or other contamination sometimes make it lose a step) writing the game was quite straightforward. But until I managed to get the ball to behave I needed to go through quite a lot of things:
- controlling the x-axis (top-side)
- almost frying my H-bridges in the process
- try adding the y-axis
- losing steps all the time on the y-axis
- almost frying my H-bridges again
- adding PWM to x and y
- noticing that drastically reducing current (through PWM) on the x-axis helped a lot as friction decreased
- tuning maximum step speed, PWM phase angles, PWM frequency,…
After a lot of debugging I finally ended up with a quite functional version for controlling the ball. Controlling the paddles was “a walk in the park” comparatively, since they only had traces on the top layer.
Gamemodes
Obviously there is a two player mode letting them compete. The first person to achieve 4 points wins. The points are displayed in binary format using LEDs on the bottom of the PCB.
I also wrote a one player mode. Until now, the opponent is programmed to play flawlessly. Therefore, it does not make a lot of fun to play in this mode at the moment (but was perfect for shooting the video at the top ;) ). If I have some free time (which is quite rare as I am writing this) I am probably going to change that.
Results
I am very happy about the outcome of this as everything works quite well by now. Playing with a physical object instead on a screen definitely changes the feel of the game - in my opinion in a very positive way.

I really learned a lot in the process of creating this game and hope that other people might like it as well :)
Write me a message if you want the source code. I also have some unused boards lying around at home - if you want one - you can also drop me a message.